Taking a screenshot on Windows is an essential skill, whether you need it for work, school, or personal use. With multiple methods available, capturing what’s on your screen is both easy and efficient. Learning how to take screenshots on Windows can save you time and help you share important information effortlessly.
How to Take Screenshots on Windows PC (9 Methods)
Windows offers a variety of built-in tools and shortcuts for taking screenshots, catering to both beginners and advanced users. From quick keyboard combinations to advanced editing tools, there’s a method for every need. In this guide, we’ll walk you through all the options available, so you can find the one that suits you best. Let’s dive into the step-by-step instructions.
1. Using the Print Screen Key (PrtScn)
Full-Screen Screenshot
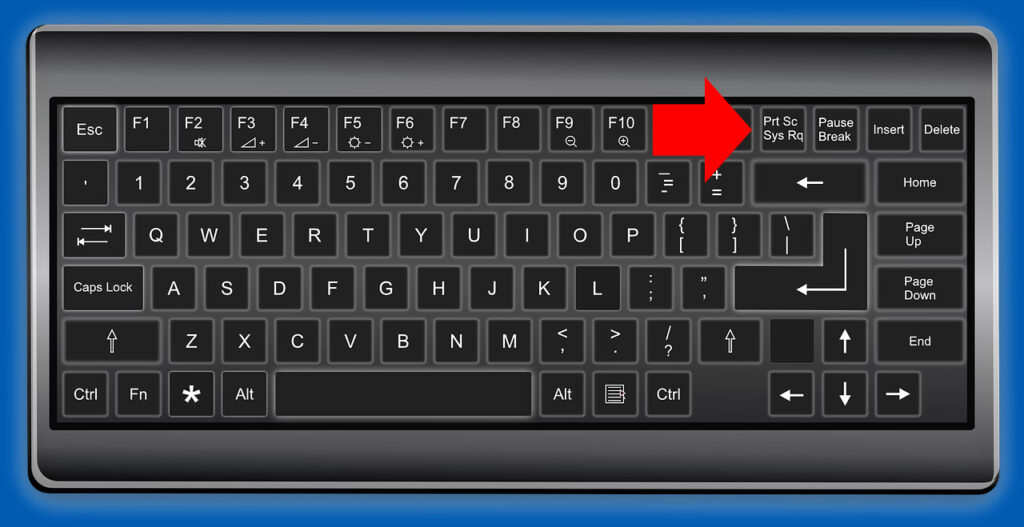
- Locate the Print Screen (PrtScn) key on your keyboard, usually found in the top-right corner.
- Press the PrtScn key to capture your entire screen.
- Open an application like Paint, Word, or any image editor.
- Paste the screenshot by pressing Ctrl + V.
- Save the file by selecting File > Save As and choosing your desired format (e.g., PNG, JPEG).

Copying to Clipboard Only
The screenshot is automatically copied to your clipboard. You can directly paste it into applications like Microsoft Teams, Outlook, or Slack.
2. Snipping Tool
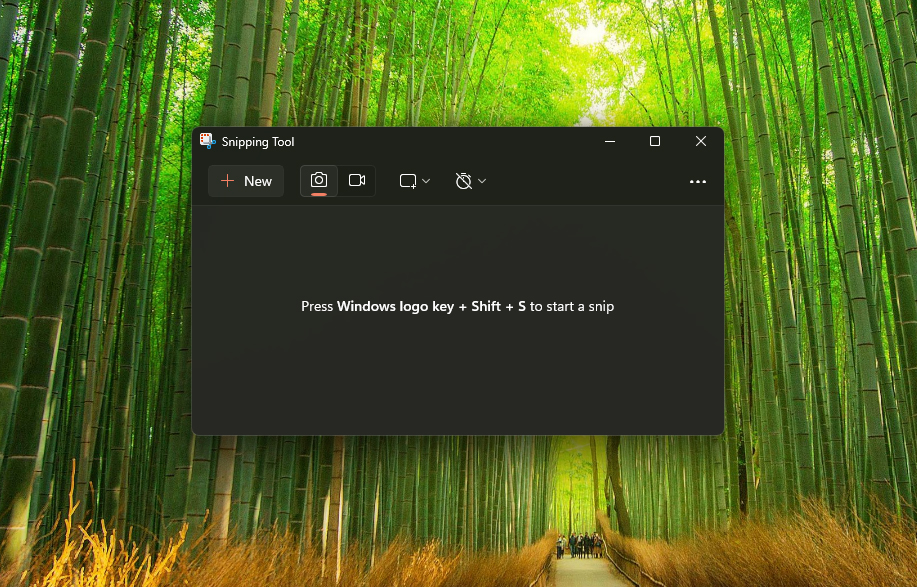
The Snipping Tool is a built-in Windows application that provides more control over screenshots. Follow these steps:
Steps:
- Search for “Snipping Tool” in the Start Menu.
- Open the application and click New.
- Select the type of snip you want:
- Rectangular Snip
- Freeform Snip
- Window Snip
- Full-Screen Snip
- After capturing, annotate or edit the image within the Snipping Tool.
- Save your screenshot using File > Save As.
Pro Tip: For quick access, pin the Snipping Tool to your taskbar.

3. Snip & Sketch Tool
Introduced in Windows 10, the Snip & Sketch tool offers a modernized way to take screenshots.
How to Use:
- Press Windows Key + Shift + S to open the Snip & Sketch overlay.
- Choose a snipping style:
- Rectangular
- Freeform
- Window
- Full-screen
- The screenshot is copied to the clipboard and appears as a notification.
- Click the notification to open it in Snip & Sketch for editing.
- Save or share your screenshot directly from the app.
4. Game Bar for Screenshots and Recording
The Xbox Game Bar allows gamers to capture screenshots and record gameplay.
Steps:
- Press Windows Key + G to open the Game Bar.
- Click on the Camera icon to take a screenshot.
- Alternatively, press Windows Key + Alt + PrtScn for a quick snapshot.
- Find your saved screenshots in the Captures folder (default location:
C:\Users\[Your Name]\Videos\Captures).
5. Third-Party Tools for Screenshots
Several third-party tools offer enhanced functionality:
Popular Options:
- Lightshot: Easy-to-use and allows online sharing.
- Greenshot: Ideal for advanced users with editing needs.
- ShareX: Offers robust features, including screen recording.
How to Use:
- Download and install your preferred tool from its official website.
- Follow the on-screen setup instructions.
- Customize shortcuts or use default ones to capture screenshots efficiently.
6. Windows Key + Print Screen for Auto-Save
This method is perfect for saving screenshots automatically.
Steps:
- Press Windows Key + PrtScn.
- The screen dims momentarily to confirm the capture.
- Locate your screenshot in the Pictures > Screenshots folder.
Note: Screenshots are saved in PNG format by default.
7. Alt + Print Screen for Active Window
To capture only the active window:
Instructions:
- Click on the window you want to capture.
- Press Alt + PrtScn.
- Paste the screenshot into your desired application using Ctrl + V.
8. Microsoft PowerPoint for Screenshots
PowerPoint includes a built-in screenshot feature.
How to Use:
- Open PowerPoint and navigate to the slide where you want the screenshot.
- Click Insert > Screenshot.
- Choose from the available windows or use the “Screen Clipping” option.
9. Using the On-Screen Keyboard
If your physical keyboard’s PrtScn key is not working:
Steps:
- Open the On-Screen Keyboard by typing “on-screen keyboard” in the search bar.
- Click the PrtScn key on the virtual keyboard.
- Follow the usual steps to paste and save the screenshot.
Troubleshooting Common Issues
Problem: Screenshot Shortcuts Don’t Work
Solution: Ensure the Fn Lock key is enabled or use the Fn + PrtScn combination.
Problem: Screenshots Are Not Saving
Solution: Check storage permissions for the Pictures folder. Make sure it has write access.
Problem: Keyboard Shortcuts Are Conflicting with Other Apps
Solution: Disable conflicting shortcut keys from other programs in their settings.
Tips for Professional Screenshots
- Use Clear Backgrounds: Before taking a screenshot, close unnecessary applications or browser tabs for a cleaner result.
- Annotate When Needed: Tools like Snip & Sketch allow for quick annotations, which can be useful for tutorials or presentations.
- Organize Your Screenshots: Regularly clean up your Screenshots folder to keep your files organized and save storage space.
Conclusion
Knowing how to take screenshots on Windows is crucial for productivity, whether you’re documenting work, sharing information, or troubleshooting issues. By mastering these various methods, you can choose the one that best fits your needs. Practice each technique to become more efficient in capturing and saving screenshots.
Read Also: