This simple step by step instruction on how to format a flash drive on a Mac OSX was made to help the new Mac OSX user easily format their removable USB Disk.
New Mac user sometimes confused where are the free space of their USB Stick goes after they deleted the files, unlike in Windows a press in the delete button on the keyboard and confirmed, your files are gone.
In Mac if you delete your files even if it is on your removable disk it goes directly to the trash, unless you emptied your trash or format your flash drive, free space won’t show. Try to empty your trash first to remove and free the space occupied in your flash drive, if you want to format completely your flash drive be sure that you back up first all your important files before you continue, if you’re ready, follow the steps below.
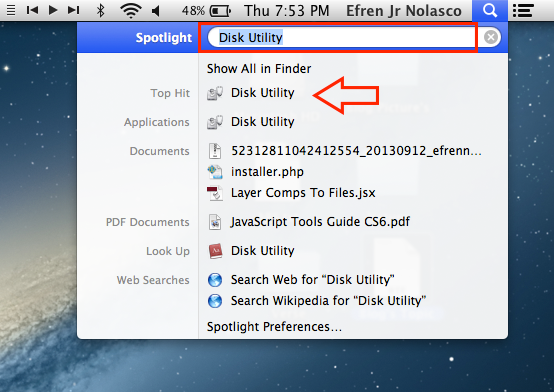
- Launch Disk Utility. You can access Disk Utility from Launchpad, Spotlight or Applications=>Utilities, I will use Spotlight in this tutorial. On your keyboard, press Command + Space bar or click on the search icon at the top-right of your status bar and type in “Disk Utility”, See the screenshot.

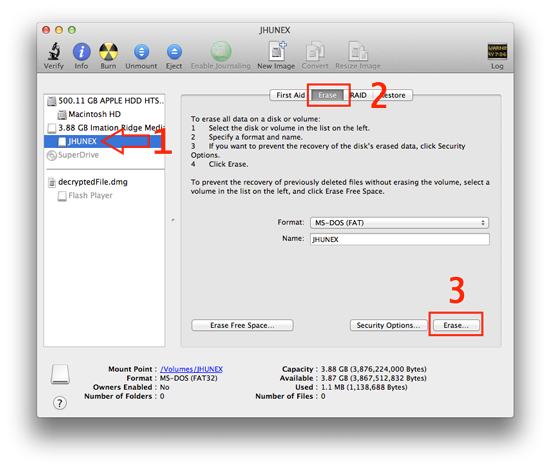
- On the Disk Utility window, select your flash drive that you want to format and click “Erase”, See the screenshot.

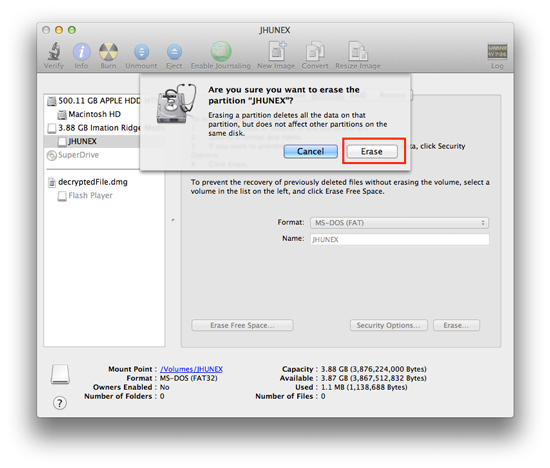
- Click “Erase” again in the pop up window to confirm the format, see the Screenshot

- You’re now successfully formatted your USB Stick or Flash Drive


