Sometimes you have some files that you don’t want others to see, let’s say there is only one computer in your home and every member of the family using it. You can copy your confidential files in an external device for you to keep it or you can just hide it in the computer.
This post will teach you how to hide files in Windows 7 Operating System (OS), all you need is to follow the simple instructions given, we provided screenshot in every step to easily follow.
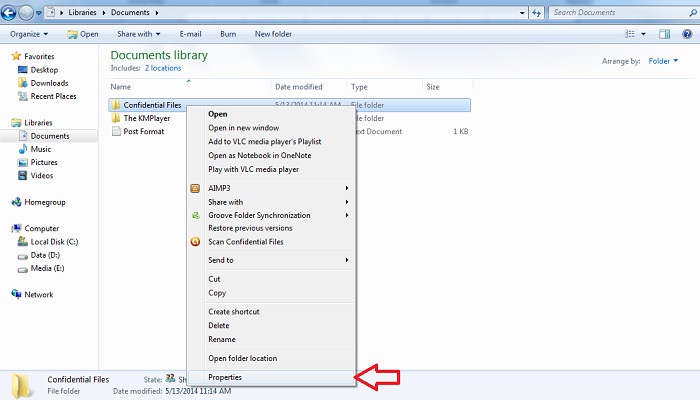
- First, right click the file that you want to hide and click properties.

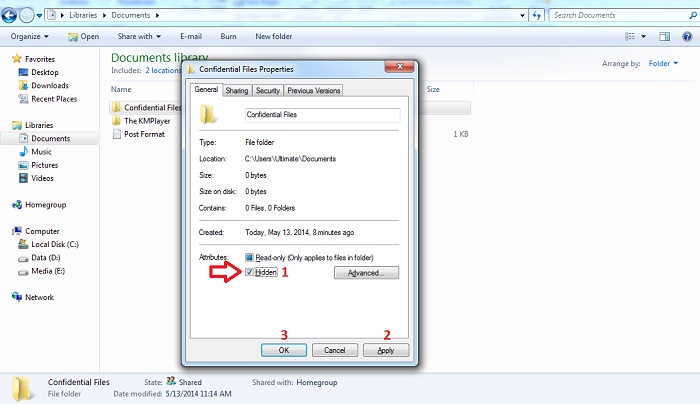
- The property window of the files you want to hide will pop up, tick the checkbox beside “Hidden” in the Attributes section, click apply and then Ok. See the screenshot.

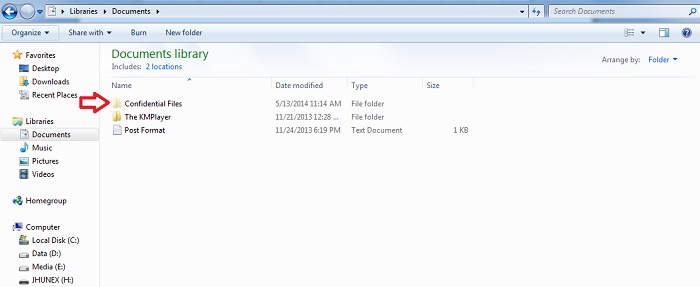
- If your current setting is to hide all the files with hidden attributes, it will automatically hide, if it is not the color of the folder or file icon will turn to pale which indicate that the file is hidden.

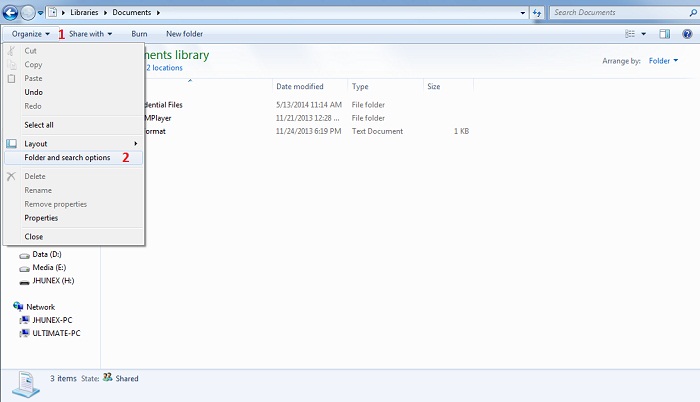
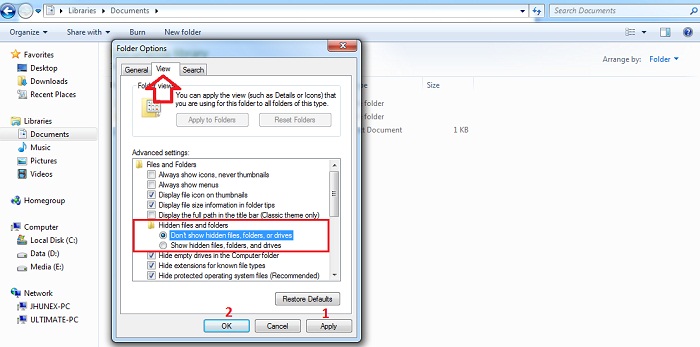
- To hide the file, On the current window, head on to “Organize” at the top left part of the screen, then click on “Folder and search options”

- Folder options window will pop up, from there select “view” tab and under “Hidden files and folders” select “Don’t show hidden files, folders, or drives” or if you want to see all the hidden files, select “Show hidden files, folders, or drives” to show all the hidden files, Click “Apply” then “Ok ” to take effect. See the screenshot.

That’s it, be sure to share if you find this helpful or just leave a comment below if you have a better and easy steps that will do the job.
