Are you having a problem with your WiFi connection, particularly the range? If you have a house that consist of several storeys or rooms, chances are, your WiFi connection can’t reach to every corner. The solution to this problem is simple, just add a WiFi range extender to make your internet available in all parts of your house.
WiFi range extender also called a wireless repeater is used to extend the range of your WiFi network by rebroadcasting the existing signal from the wireless router to create second network.
This article will show you the step by step procedure how to setup TP Link Universal WiFi range extender. Although quick installation guide included in the box, sometimes it’s confusing especially for beginners. To make it easy to understand and follow I’ll take screenshot in every step. Just follow along with the given steps below.
Note: Before we proceed make sure that you have a router or WiFi connection that you want to extend the range or else this will not work.
- First open up your favorite browser and go to tplinkextender.net then enter the default username “admin” and password “admin”.

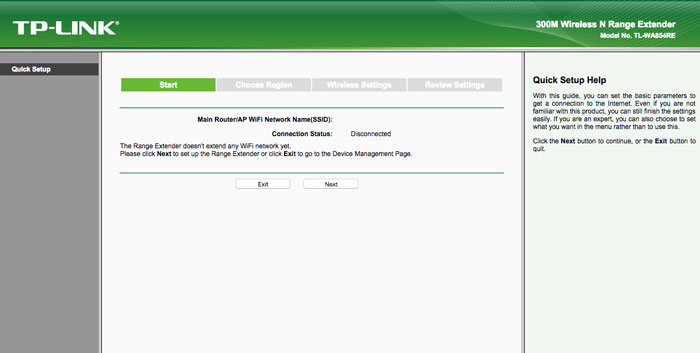
- You will redirected to quick setup wizard, click next to continue.

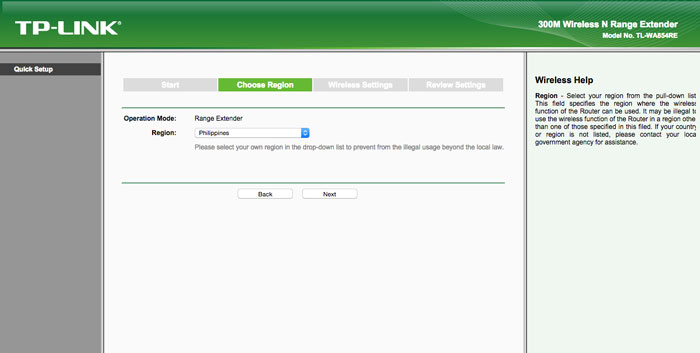
- Choose your current region, then click next to continue

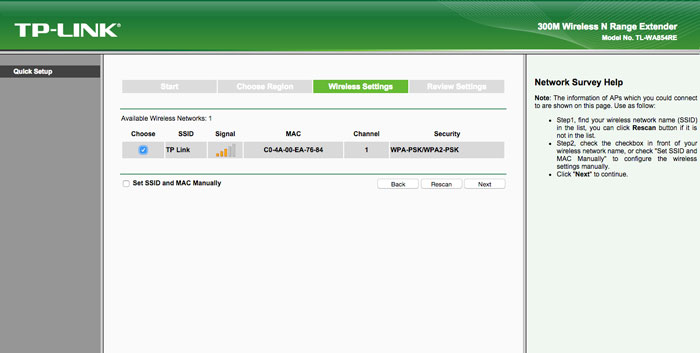
- The extender will automatically detect all the existing network in range, all you have to do is select the network that you want to extend.

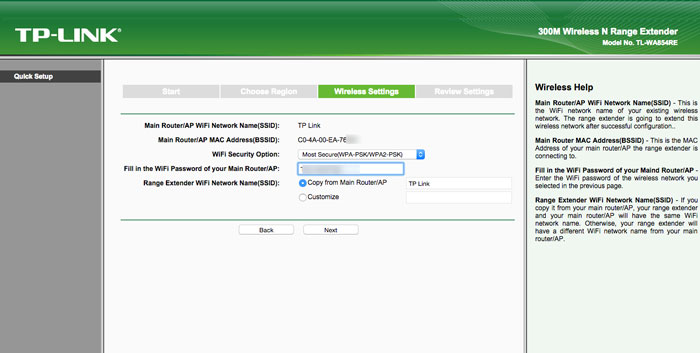
- Enter the password to grant access to your existing network and rebroadcast the signal, it will automatically copy the Network Name or SSID of the existing network. Click next to continue.

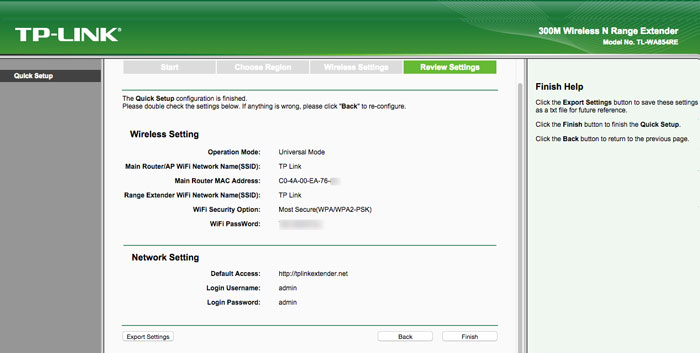
- Review all the settings and click “Finish”

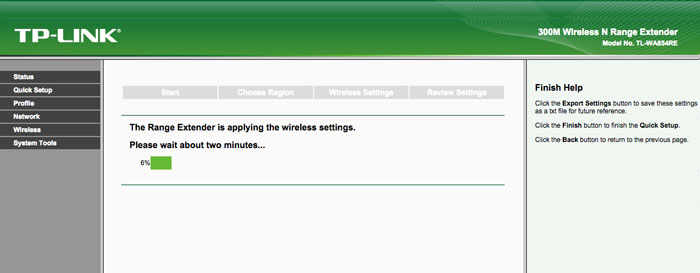
- Your TP Link WiFi range extender will automatically apply all the settings that you setup in the previous steps, wait for at least 2 minutes until it finished.

That’s it, you will notice that the range of your current network expands, and if you place your WiFi range extender in proper place, every corner of your house has internet connection.

